This one has been a long time coming.
I actually ordered one of these almost eight weeks ago, but it took nearly six weeks to arrive.
The first shipment was apparently lost, and the second shipment landed while I was out of town on a work/cutting trip.
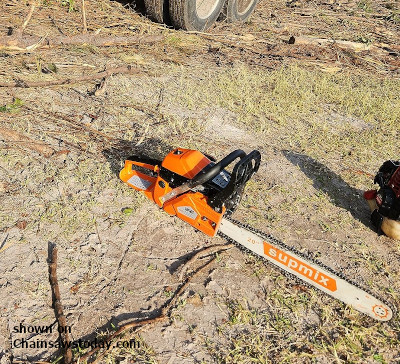
After using it for a couple of weeks and maybe 30+ hours of cutting, I’m eager to tell you my thoughts. First, the basics…
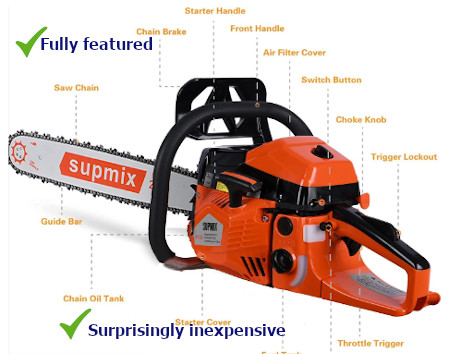
SupMix 20″ 62cc Chainsaw Specs
-
- 4.2 Hp
- 62cc
- 2-stroke engine
- front and rear anti-vibration handles
- electronic ignition
- 8500 rpm max
- low kickback chain
- chainsaw weight 14 lbs
Contents include:
chainsaw
chain
guide bar
spark plug
tool kit
2L fuel mixing bottle
oil hopper
instruction manual
Setup
This SupMix comes in a box somewhat unassembled just like any other brand new saw. You have to install the bar and the chain, then set the tension.
There are a few other things you have to do before you use it the first time, but unless it’s your first saw, you won’t have any surprises. And if it is your first saw, no worries, they have enough documentation that you shouldn’t have any trouble.
Of course you will want to premix the oil and gas. And don’t forget to fill up the bar/chain oil.
My Review
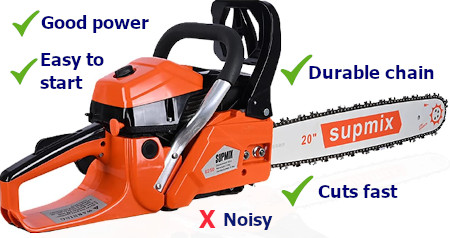
 This thing starts easily. I have heard some folks complaining about getting it started, but I often wonder if those are people that complain about starting all saws. I had no trouble hot or cold, a few pulls of the cord and it was rip-roaring.
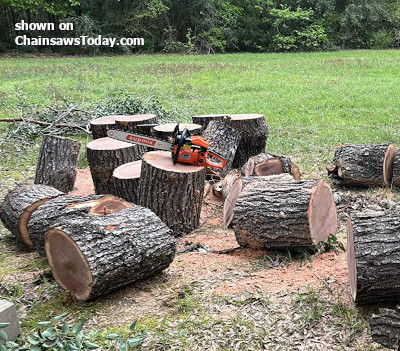
It cuts really well. Plenty of power, nice and straight, no stumbles.
One of the few complaints I have is about the noise. Wow, this thing is loud!
Maybe the Supmix guys spent their money on a good engine and chain and carb and scimped on their muffler?
I always wear hearing protection, and you should too. But this saw is very loud, and your neighbors (if they are close) are going to know it.
The other thing is replacement parts. There is a certain amount of confusion about what chain the saw needs. For clarification, it takes a 0.325″ pitch, 76 link, 0.058″ gauge. They are not hard to find.
Like I said at the beginning of the article, I put probably 30 or more hours on this saw. If you went on a 30 hour long date, you’d know that lady/guy pretty well, right?
This thing is thirsty for fuel, but it is 4.2 HP, and I ran it hard.
It has good balance, and the ergonomics are decent. I mentioned earlier in the specs that they list it as 14 lbs. It’s no lightweight, but these days with big honking batteries for battery chainsaw versions, the gas versions can feel lighter and even sporty in comparison.
The saw cuts fast, and the chain seemed both sharp and durable. Over the course of several days and the 30 hours, I did some basic sharpening, just hitting it with a quick file. Check my post about sharpening if you need the help.
I did not have any problems with tensioning, or kickback.
I’m always careful to keep bar oil filled. Running one dry is a great way to wreck the bar, the chain, and even stress the motor. I did notice once that the bar oil usage seemed to slow down compared to the fuel usage and run time. It made me think I had a clog in the bar, or maybe the pickup in the tank isn’t positioned well.
That isn’t necessarily a complaint, just something I noticed that made me suspicious. So if you buy one of these, keep a careful eye on it and top it off frequently.
So that’s my review. It’s a good saw, and an incredible bargain for the money. If you want to check latest pricing, you can click here.
 You will no longer be uneducated, or have to rely on random nextdoor neighbor guesstimates. You are going to get the real, accurate scoop…
 Maybe you’re ordering wood and the guy is going to sell you a certain number of cords for $100. Maybe you’re cutting or splitting wood, and you’re wondering how much there is to cut or split. Regardless, you don’t say “a truckload” or “about 500 pounds”. You use the number of cords to describe the amount.
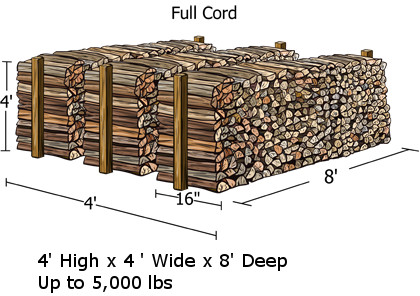
 You can use those dimensions to help you estimate the volume of wood in uncut, unsplit logs too. If you have a pile of logs that are 16 feet long and roughly 4 feet high and 4 feet wide, then you would extrapolate that to mean there are 2 cords of wood there. Make sense?
 I have been watching with great interest as electric log splitters have gotten better and more available over the years. There are a lot of great things you get with electric, even though it has some drawbacks too.
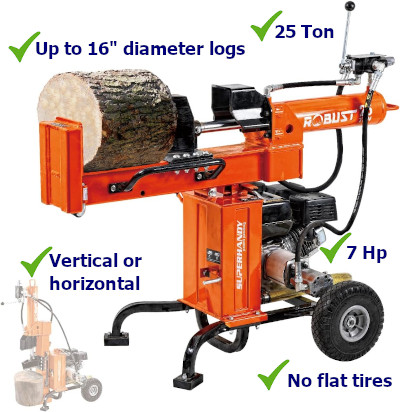
 I’m no dummy, I’m pretty handy and can put pretty much anything together. But when they say it may require two people to assemble… they ain’t lying.


 I am a little ashamed to admit this, but for a long time I would use a chain until it got too dull to cut, and I would throw it away.


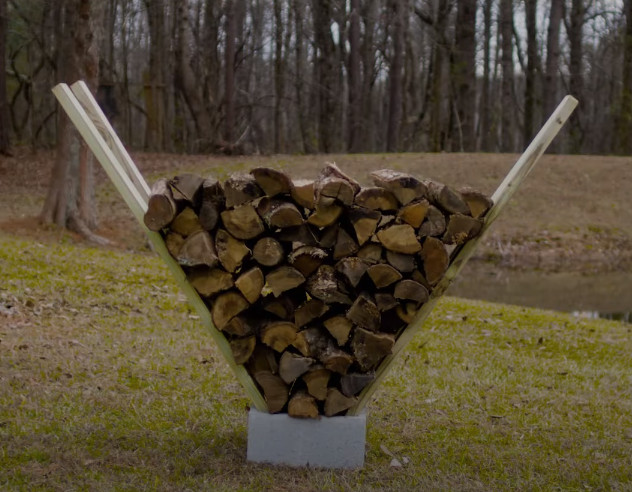
 If you’ve been hanging around ChainsawsToday for very long, you know I’m not prone to drama or histrionics. But I’m a firm believer that every home needs a backup heat source.
 I am going to give you some tips about stacking and storage.