Over the last few years, I have branched out from doing only arborist, tree trimming, and wood splitting duties and began including general handyman work.
Part of that has just been demand. Yes, there is still plenty of work coming my way that keeps my chainsaw running. But as word has gotten around, people increasingly were asking me to do additional duties.
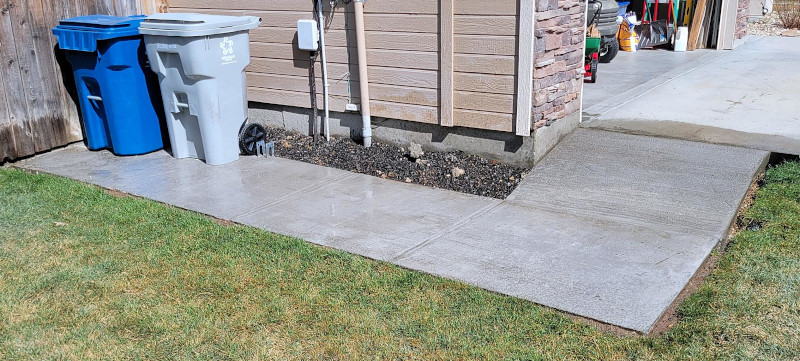
It varies wildly. I might hang a ceiling fan, pour a concrete pad, install a new mail box, or build a shed.
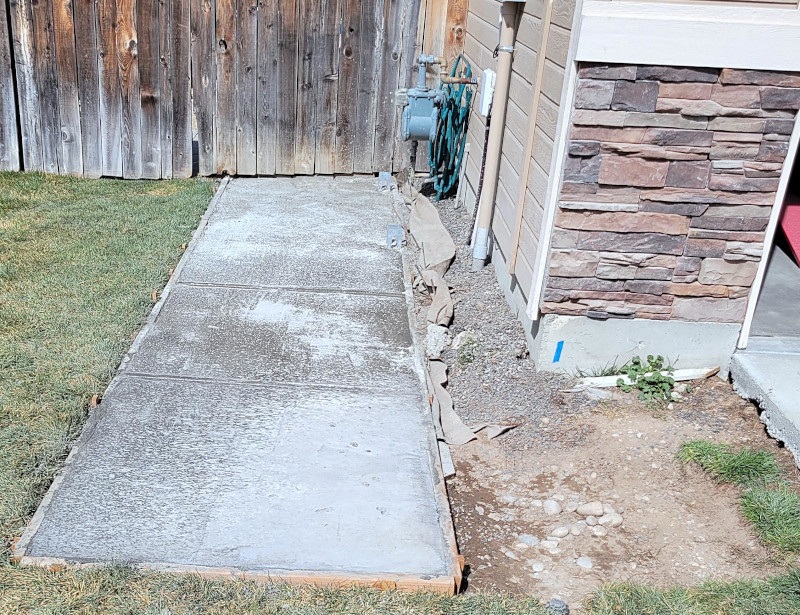
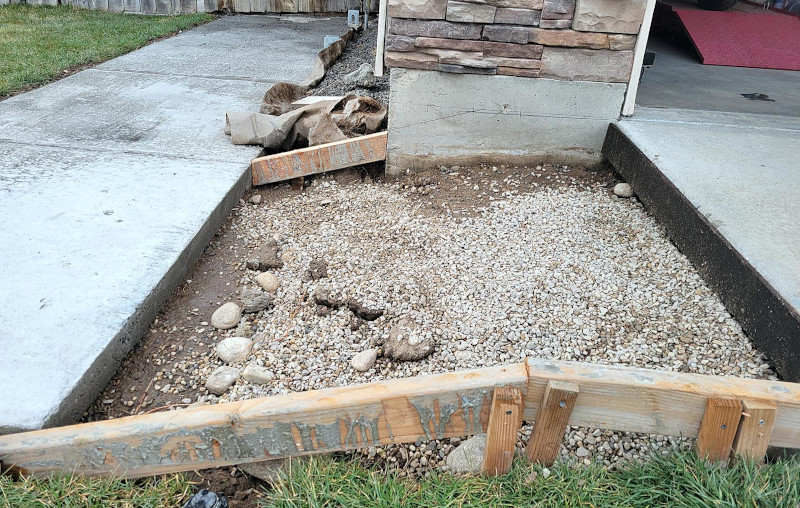
 Recently, a customer asked me to take down an old rotten, leaning pine tree. While I was cleaning up that mess and hauling away the debris, he and his wife mentioned they hadn’t had any water for two days because a water line from their well pump sprang a leak and they were still waiting for a visit from a plumber.
I scoped this out, told them I could replace the entire 100 ft run of black roll pipe with 0.75 in PEX, and get started on it that day. We shook on it, and had his water turned back on by 1 AM!
In the process of replacing his water line, I was in and out of his crawlspace quite a bit. Some sections had some moisture damage and signs of mold. I’m far from a crawlspace expert, but I told them at a bare minimum:
1. they might want to consider laying down some plastic sheeting for moisture control
2. they might want to install a dehumidifier for long-term piece of mind
Before you know it, they had hired me to install a dehumidifier!
Why I Chose an Alorair 70 PPD Dehumidifier
When I started shopping around, Alorair stood out as one of the premium, high-quality dehumidifier brands.
They have been around since 2012, and claim to have sold more than 2 million units! Their customer base seems very loyal.
All of their products carry a 5 year warranty. I think it means something when a company stands behind their products. I didn’t want to sell this elderly couple some kind of cheap piece of junk that would only last a year or two.
Their products are Energy Star Certified. A dehumidifier can use 300-500 watts. Do you want to pay a high power bill to run a sloppy, inefficient unit in your crawlspace? Most people don’t. The Energy Star Certification gives some reassurance towards efficiency and minimal impact on power bills.
They ship from the US, so minimal wait times once purchased.
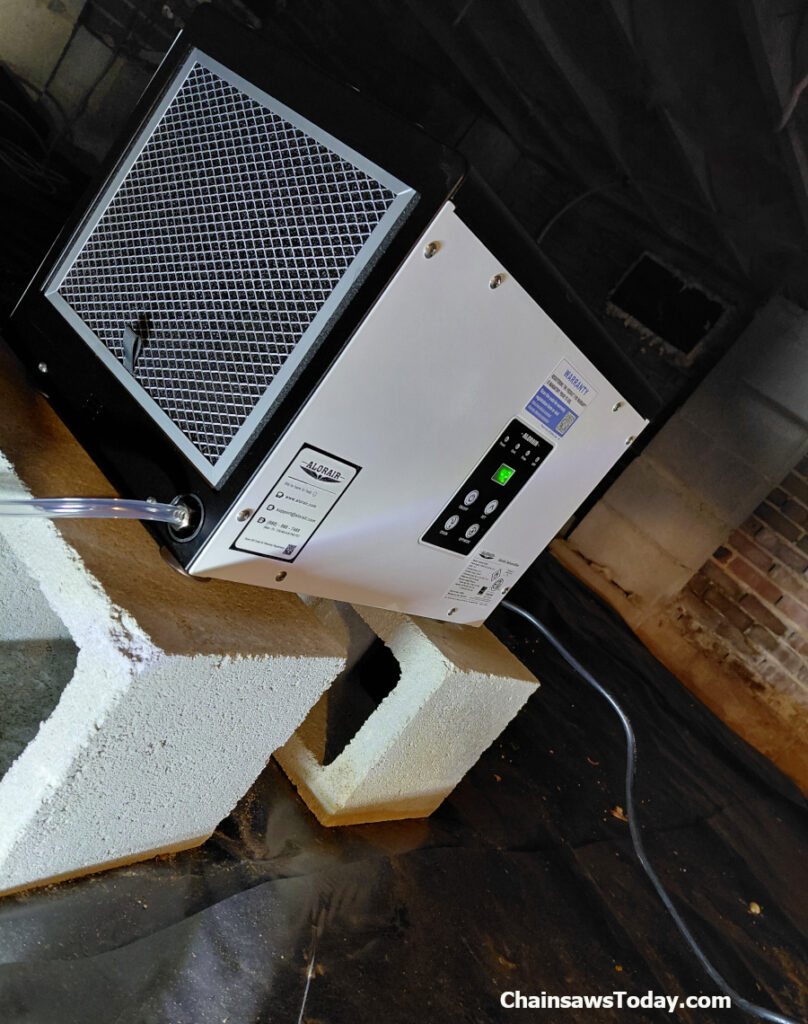
Because of the crawlspace layout, with a light bulb and an outlet roughly in the middle of the area, I couldn’t count on a gravity feed to get the water collected to flow out. Alorair offers a pump option for most of their models, and include a 19 foot hose to improve mounting and location flexibility.
The area of this particular crawlspace was around 30 feet by 30 feet, so roughly 900 square feet. The Alorair 70 PPD says it’s suitable for up to 1,000 square feet.
AlorAir Sentinel HD35P Specs and Features
For ease of reference, I’ve included the HD35 user manual HERE.
And also the HD35 spec sheet HERE.
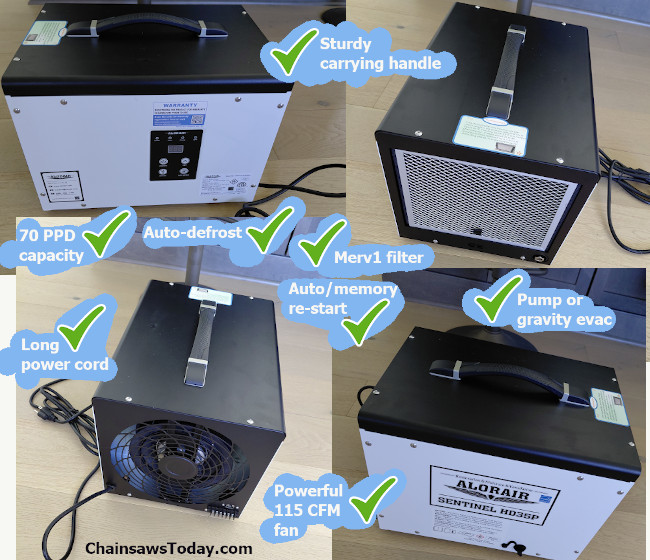
The Sentinel HD35P is one of AlorAir’s smallest and most basic models, but this is a semi-commercial piece of equipment packed with performance and durability enhancing features.
It can remove 70 PPD (pints per day) of moisture at saturation temperatures, and 35 PPD at standard AHRAM (this is at 80F and 60% relative humidity).
It weighs 39.7 lbs, but lugging it around is reasonably easy due to the beefy handle integrated into it’s top side.
Its fan flows 115 CFM of air, and manages to do this fairly quietly at under 50 dBA.
It has an auto defrost mode, which is handy because nobody wants to climb down into their crawlspace and defrost a humidifier. Along those lines, it also has a an auto/memory restart. That means if your power goes out or blinks off, once power is restored it starts right back up like it was before, again preventing you from having to climb into the crawlspace to restart it.
It has a Merv-1 filter to keep dust, pollen, and debris out of its sensitive bits. That’s important in a crawlspace, as it can be a grimy environment. Yes, the filter has to be cleaned or replaced every so often, but that’s a lot cheaper than replacing a dehumidifier!
And I guess I should mention the HD35P is set up for a 120V outlet. I saw some big monster dehumidifiers that required 240V, and I did not want to go through that trouble.
My Installation Process and Tips
I guess this is sort of mislabeled, since installing the AloAir unit is so easy that it doesn’t really require any tips.
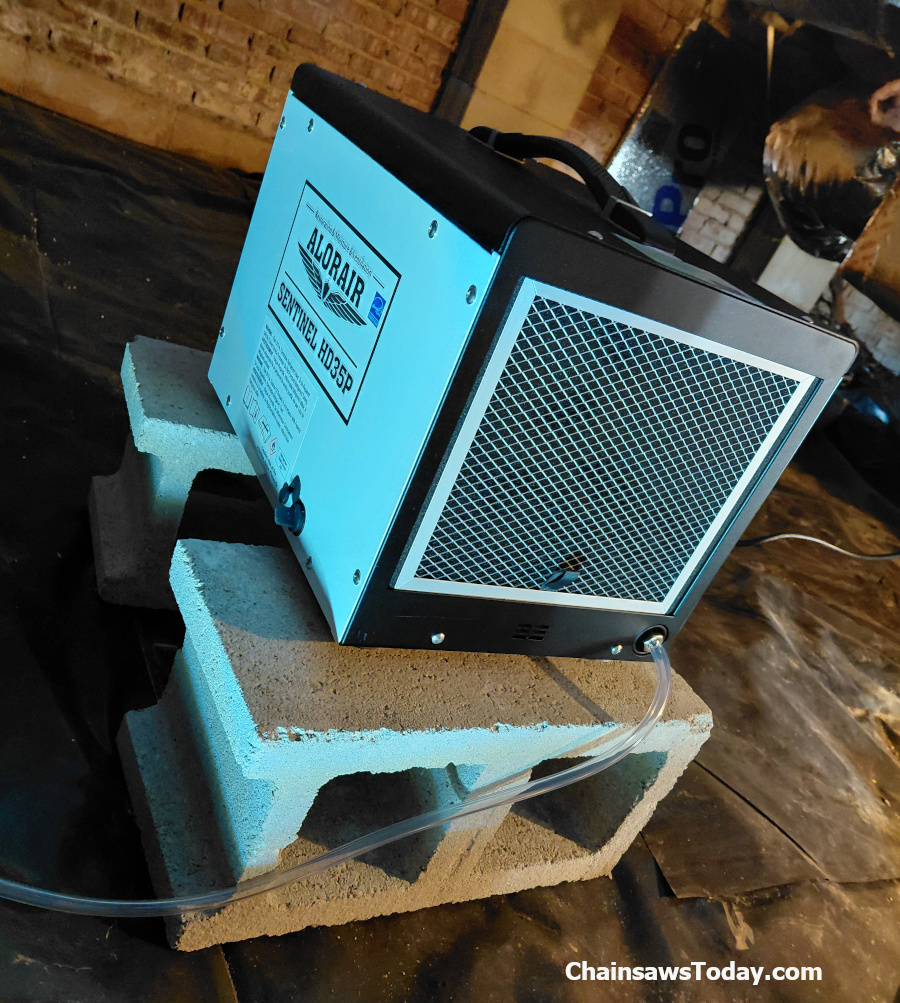 I put the unit on two concrete blocks. You need it to be reasonably level, so that the pump and drain can work properly.
I ran the (thankfully long) drain hose to a crawlspace vent and poked it through so that accumulated water could be pumped outside.
I plugged the (again, thankfully long) power cord into an existing 120v outlet near the only light bulb in the crawlspace.
And then I followed the directions to turn it on and set the humidity level.
My Opinion
In my opinion, you are not going to find a higher quality, more durable crawlspace dehumidifier at this price point.
This unit was very easy to install, and I fully expect it to last my customer for many years without any trouble.
If you want to look over the AloAir lineup, you can click here…
 Sometimes I do my best thinking while I’m driving.
 I tend to get a lot of satisfaction from cleaning things up. It’s not that I’m a neat-freak. Half the time my truck is a muddy mess. My clothes might be sweaty and dirty from working all day. If you looked at some of the tools in my garage you would think I’ve never wiped them down.
 Well, the weight. That Simpson weighs 77 lbs. That might be fine if you are just using it at home, wheeling it out of your storage shed over to the corner of the house. But trying to get it into the bed of the truck (or worse yet the cab) is a back-breaking affair.
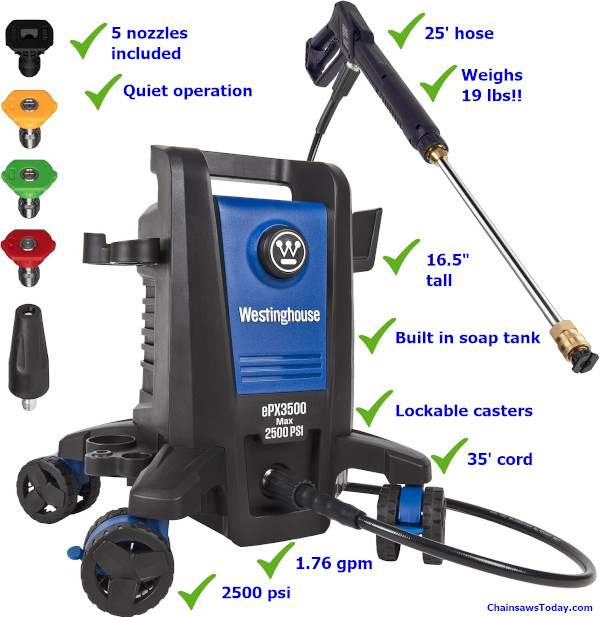
 Setup was easy, and all of the attachments were well packaged.
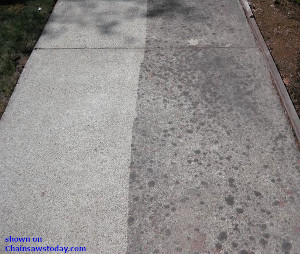
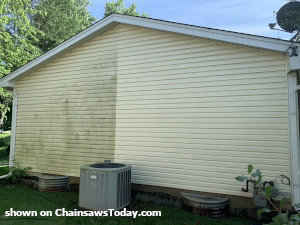 It has plenty of power. It took the grime off vinyl siding with no sweat. I then tackled a big section of a concrete driveway. Even though I used it on the driveway continuously for over an hour, it did not overheat or flinch. It really seems to have as much power as the 80 lb behemoth I have traditionally used.
 My house has central AC, handled by a big heat pump. The unit is only about 4 years old, and is relatively efficient.
 That means during the height of summer, I work my heat pump pretty hard. Ignoring the electricity costs, which can be pretty high during really cold or really hot months, I hate beating on this big expensive heat pump, knowing that it will cost a fortune to replace or repair once it wears out.
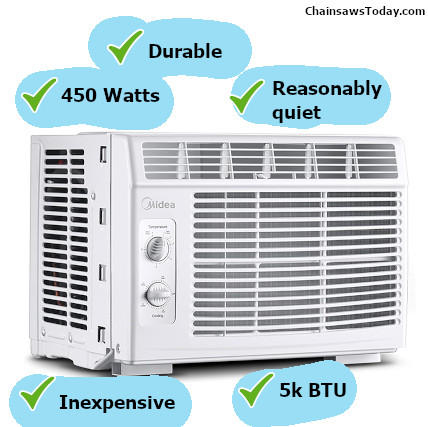
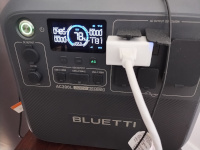 I use a Bluetti AC200L.
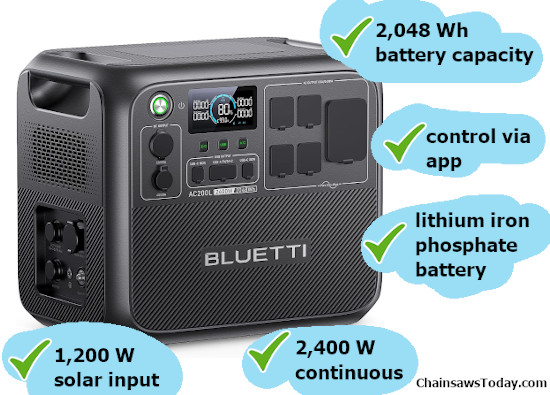
 I have used one of Bluetti’s AC200P units in the past. There was nothing wrong with it, but the AC200L is a giant step forward.
 Much of the trail is not accessible by any type of motorized vehicle.
 1) You can never have too much water. Well, okay, if you took a zillion gallons and the weight was more than you could carry, of course that would be too much. My point here is doing all that hard work will make you sweat, and you are going to need to hydrate.
 2) A saw that’s too big is not ideal for this type of job. Using more fuel than you need is a terrible idea if you have to backpack in all of your supplies. I used a small
  3) Pack some toilet paper. I don’t want to get too personal here, but in some cases I was an hour or hour and a half walk from the truck. At even then, I would have to drive to a nearby gas station or store to find a bathroom. That’s not going to work, guys! I packed some TP, and when I had to go I did so behind a tree.
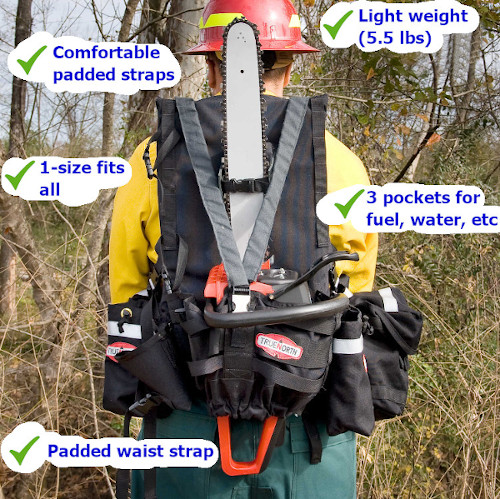
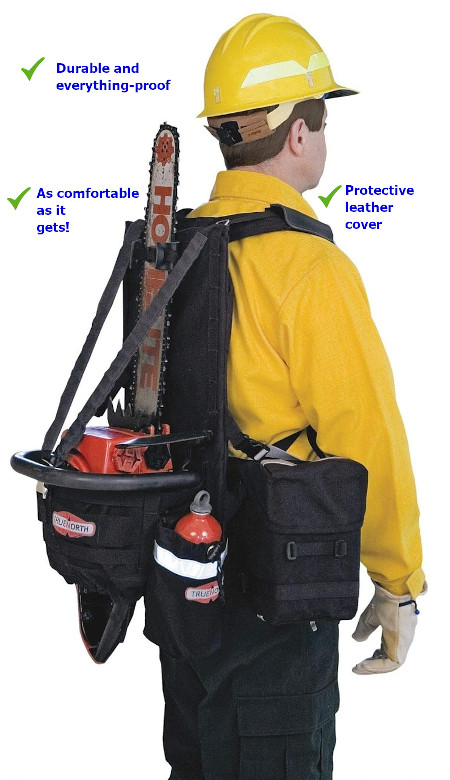
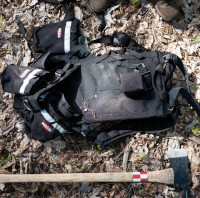 They don’t list a weight capacity, but I figured my back would probably give out before this pack would!
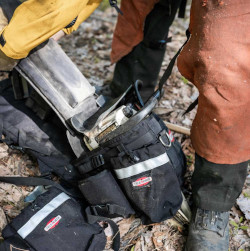 It is basically one size fits all. All of the straps are adjustable. I’m a pretty bulky guy, and it fit me just fine. Maybe if you’re more than 300 lbs or less than 100 lbs it could give you some trouble, but outside of that it was just the right size.
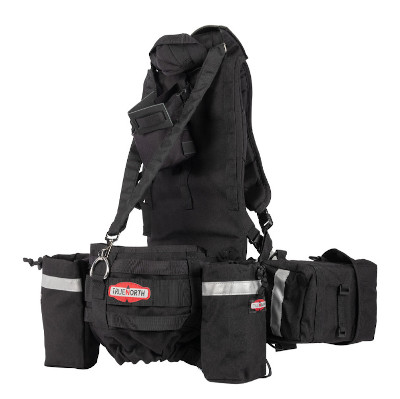
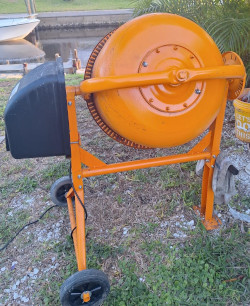 These days I stay pretty busy as a local handyman.
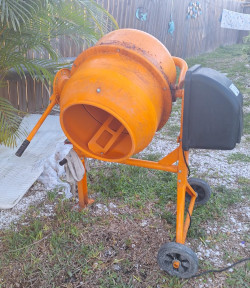 The local hardware place wanted $60 per day to rent out a cement mixer. I thought it would take me probably a day and a half, and when you look at transport time and cost, it was going to cost me right at $150 to rent one. It was apparently I could buy an inexpensive one for not much more than that, so I pulled the trigger!
 My twenty year old air compressor finally gave up the ghost.
 The “gallon” refers to the size of the tank. This is like a battery. The bigger the volume of the tank, the longer the compressor can run a tool before the motor kicks on.
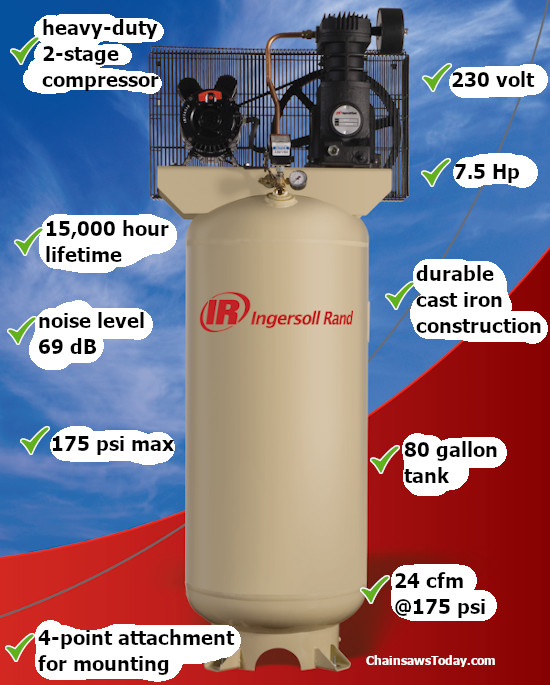
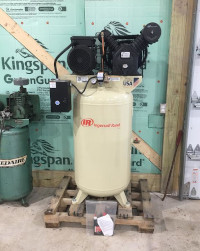 It arrived in a big crate, and I made quick work of uncrating it and moving it into it’s final position with a dolly and some grunting and shoving.
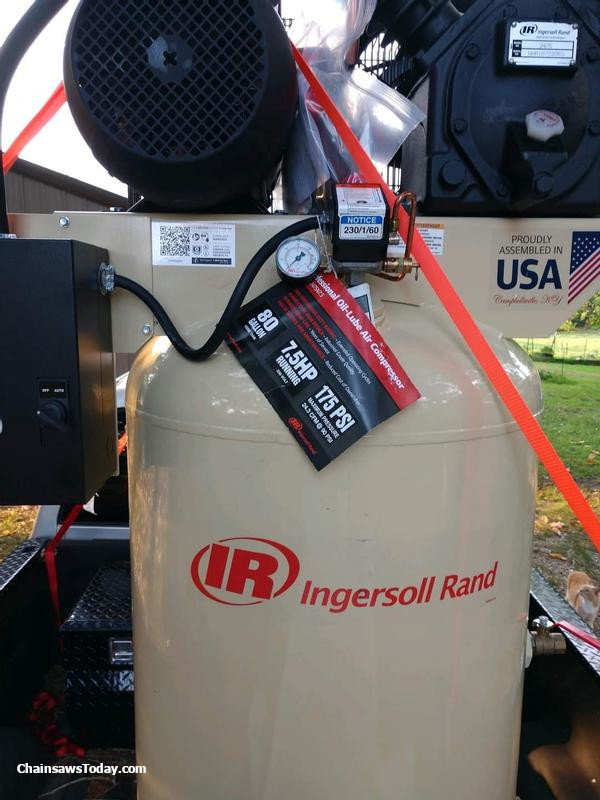
 Raise your hand if you’ve ever lugged a heavy, noisy, vibrating string trimmer all over God’s green earth and then had a backache that evening.
 They are really made for cutting acreage. And even then, depending on your terrain and what you’re trying to cut, they may not be suitable.
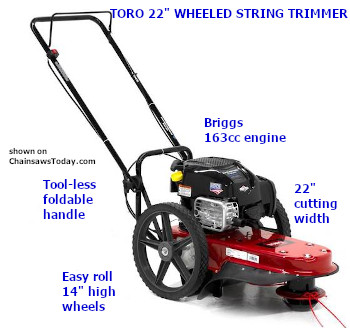

 Or maybe you live on a tropical island and you don’t even own a winter coat!


 I have been watching with great interest as electric log splitters have gotten better and more available over the years. There are a lot of great things you get with electric, even though it has some drawbacks too.
 I’m no dummy, I’m pretty handy and can put pretty much anything together. But when they say it may require two people to assemble… they ain’t lying.