Depending on where you live, you may have to deal with frigid temps all the time, or it may just be a cold snap every now and then.
 Or maybe you live on a tropical island and you don’t even own a winter coat!
You know what sucks? Frozen pipes.
If you’re really lucky, they freeze and thaw without bursting and it doesn’t cost you a fortune.
When they burst, they can cause extensive property damage. Think about flooding your house or basement, ruining drywall, ceilings, furniture, electrical appliances. It can be a nightmare even with good homeowner’s insurance.

Even in the best case, if the pipes don’t burst, it’s a pain in the butt. Nothing kills a busy weekend full of obligations or plans like having zero water service. You can’t shower, do stuff in the kitchen, wash clothes, and if unlucky you may not even be able to use your toilet. Ya might only get one flush (I’ve been there).
If you come here to ChainsawsToday looking specifically for content about chainsaws, cool. But I get dragged into more handyman stuff than you can shake a stick at, and I recently helped an elderly lady harden her plumbing against cold weather. She had been dealing with the nuisance and the risk of frozen pipes for several years, and for a minimal amount of time, effort, and money I was able to help fix that for her.
I figured I would drop something on the website to help others looking for the best options for pipe insulation and heat tape.
Pipe Insulation
Insulating risky pipes is one of the easiest and most inexpensive options.
Any pipe or connection that is above ground is at risk. Some areas to watch out for…
pipes in a crawlspace
pipes running from a well pump into the ground
outside hose bibs or spigots, and the pipes running to them
Depending on your location and how cold it gets, underground pipes can be a problem too. The frost line varies by region, and hopefully your pipes are a) buried deep enough to be below the frost line, and b) insulated down to that point.
Foam pipe insulation is a great option.
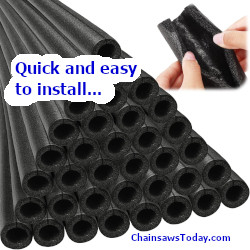
This is generally made of closed-cell polyethylene foam. It usually comes with a split down its lengthwise run, which makes it very quick and easy to install. It’s flexible, pretty wear resistant, not easy to tear or tear up. It’s not terribly expensive. If installing it somewhere it could be exposed to wind, I would recommend adding spots or even entire strips of tape to seal the slit once installed, that way it can’t blow off.
Also, for connections and T’s, you should probably butt pieces up against one another and seal them with tape.
Purchased in bulk, this will cost you around $1/ft.
Insulating tape is another option.
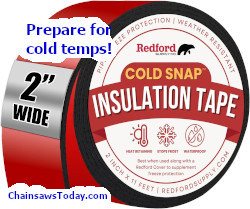
It insulates just as well, or in some cases even better than the split foam tube option, but it’s harder to install.
When I say “harder”, it don’t mean like rocket science. You just have to wrap the roll around each pipe carefully, with (ideally) an even and precise overlap.
Costing this option is a little tricky. Because you’re wrapping it around the pipe, linear feet on the tape roll doesn’t equate to linear feet on the pipe. Plus you need overlap. A rough rule of thumb is assume a 30′ roll of 2″ wide tape will cover around 15′ of 1/2″ diameter pipe. With that assumption, the cost is about the same as the foam insulation.
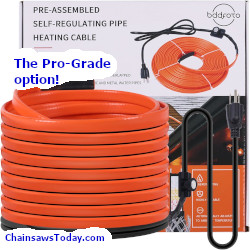
If you need to up your game, pipe heat tape or heat cable may come into play.
This is basically like a heated blanket for your pipes. You can wrap the tape or cable in a spiral around each pipe, or in some cases you just run it straight down each length. Most kits come with tape or anchors to fasten it around the pipe. You then plug it into an outlet, and when powered a resistance heating keeps the material warm and prevents freezing.
Nobody wants to stomp around in the middle of a snowstorm plugging their pipe heaters in. I usually recommend plugging them in to one of the small, cheap wifi controllers like this, and that way you can turn each on and off with your phone. Some of the more expensive versions come with thermostats, which is even nicer.
There are a couple of drawbacks to going the powered route. Number one, there are only so many plugs and outlets that can be managed. If you have more than a couple of runs of this, it becomes like a Clark Griswold Christmas Vacation thing where you are just itching to blow a fuse or trip a breaker. And of course electricity costs money, so your power bill may suffer.
On the other hand, if temps are sub-zero and brutally cold, insulation without a heated option may not be enough.
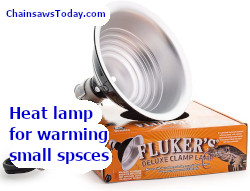
One final item I’ll throw out there, I use a heat lamp in my well pump house. My well pump and reservoir sit under a little 3’x3’x3′ plastic dome. The dome has some insulation on the underside, but not much, and it’s crumbling away anyway from age. I had a problem with some components freezing a few years ago during a cold snap, so I set a heat lamp out there and wired it to a wifi outlet controller.
Of course you have to use an “old school” incandescent bulb. Modern day LED bulbs are too efficient, and produce too little heat to have a protective effect. Any time it gets below about 20 degrees, I turn the well pump house heat lamp on the prevent problems.